Introduction
Laravel continues to set the standard for PHP web development with its elegant syntax and robust ecosystem. With the release of Laravel 12, the framework has refined its “batteries-included” philosophy, offering even better performance, a slimmer directory structure (inherited from version 11), and enhanced developer tools.
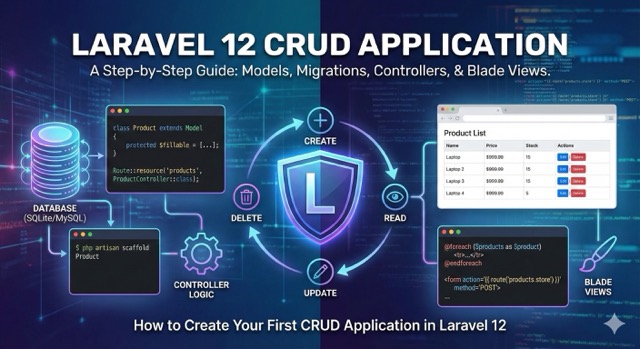
If you are just starting out or looking to refresh your skills with the latest version, building a CRUD (Create, Read, Update, Delete) application is the perfect rite of passage. It touches on all the core concepts: routing, controllers, Eloquent ORM, database migrations, and Blade templates.
In this guide, we will build a simple Inventory Management System where users can list, add, edit, and delete products. We will write this specifically for Laravel 12, covering the latest best practices.
Prerequisites
Before diving in, ensure your development environment is ready. Laravel 12 pushes the envelope on modern PHP, so you will need:
- PHP 8.2 or higher: Laravel 12 leverages modern PHP features like types and readonly classes.
- Composer: The PHP dependency manager.
- Node.js & NPM: Required for compiling frontend assets with Vite.
Step 1: Install Laravel 12
First, open your terminal and create a new Laravel project. We will name our application inventory-app.
Bash
composer create-project laravel/laravel:^12.0 inventory-app
Once the installation allows, navigate into your project directory:
Bash
cd inventory-app
You can start the local development server immediately to check if everything is working:
Bash
php artisan serve
Visit http://localhost:8000 in your browser. You should see the sleek, minimal Laravel 12 landing page.
Step 2: Database Configuration
By default, Laravel 11 and 12 simplify the database experience by defaulting to SQLite. This is fantastic for learning because it requires zero configuration—it’s just a file in your database directory.
If you prefer MySQL, open the .env file in your root directory and update the DB_ variables:
Code snippet
DB_CONNECTION=mysql
DB_HOST=127.0.0.1
DB_PORT=3306
DB_DATABASE=inventory_app
DB_USERNAME=root
DB_PASSWORD=your_password
For this tutorial, we will stick with the default SQLite setup. It works out of the box!
Step 3: Model, Migration, and Controller
In older versions of Laravel, you might have created the Model, Migration, and Controller separately. Laravel 12 allows us to generate all of these in one go using the streamlined artisan command.
We will create a Product model. Using the -mcr flag, we tell Laravel to also create a Migration, a Controller, and a Resource (which pre-fills the controller with CRUD methods).
Bash
php artisan make:model Product -mcr
You will see output confirming the creation of three files:
app/Models/Product.phpdatabase/migrations/xxxx_xx_xx_create_products_table.phpapp/Http/Controllers/ProductController.php
Defining the Migration
Open the migration file located in database/migrations/. It will be the last file in the list. We need to define what a “product” looks like in our database. Update the up method:
PHP
public function up(): void
{
    Schema::create('products', function (Blueprint $table) {
        $table->id();
        $table->string('name');
        $table->text('description')->nullable();
        $table->decimal('price', 8, 2);
        $table->integer('stock');
        $table->timestamps();
    });
}
Now, run the migration to create the table:
Bash
php artisan migrate
Configuring the Model
Open app/Models/Product.php. To allow us to easily save data to these fields (Mass Assignment), we need to define the $fillable property.
PHP
namespace App\Models;

use Illuminate\Database\Eloquent\Factories\HasFactory;
use Illuminate\Database\Eloquent\Model;

class Product extends Model
{
    use HasFactory;

    protected $fillable = [
        'name',
        'description',
        'price',
        'stock',
    ];
}
Step 4: Routing
Laravel 12 keeps the routing simple. Open routes/web.php. We will define a “Resource Route” which automatically maps all the standard CRUD actions (index, create, store, show, edit, update, destroy) to our controller functions.
Add this line to routes/web.php:
PHP
use App\Http\Controllers\ProductController;
use Illuminate\Support\Facades\Route;

Route::get('/', function () {
    return redirect()->route('products.index');
});

Route::resource('products', ProductController::class);
We also added a redirect so that visiting the homepage (/) takes us straight to our product list.
Step 5: Implementing the Controller Logic
Now comes the “brains” of the operation. Open app/Http/Controllers/ProductController.php. You will see empty methods ready for us to fill.
1. Index (Read – List all)
This method retrieves all products and passes them to a view.
PHP
public function index()
{
    $products = Product::latest()->paginate(5);
    return view('products.index', compact('products'));
}
2. Create (Show the form)
This simply returns the view where we can add a new product.
PHP
public function create()
{
    return view('products.create');
}
3. Store (Create – Save to DB)
Here we validate the incoming data and save it. Laravel 12’s validation is powerful and succinct.
PHP
public function store(Request $request)
{
    $request->validate([
        'name' => 'required',
        'price' => 'required|numeric',
        'stock' => 'required|integer',
        'description' => 'nullable'
    ]);

    Product::create($request->all());

    return redirect()->route('products.index')
                     ->with('success', 'Product created successfully.');
}
4. Edit (Show the update form)
We find the specific product and send it to the view.
PHP
public function edit(Product $product)
{
    return view('products.edit', compact('product'));
}
Note: Because we used Route Model Binding (type-hinting Product $product), Laravel automatically finds the product by ID for us.
5. Update (Update – Save changes)
Similar to store, but we update the existing record.
PHP
public function update(Request $request, Product $product)
{
    $request->validate([
        'name' => 'required',
        'price' => 'required|numeric',
        'stock' => 'required|integer',
    ]);

    $product->update($request->all());

    return redirect()->route('products.index')
                     ->with('success', 'Product updated successfully');
}
6. Destroy (Delete)
Remove the item from the database.
PHP
public function destroy(Product $product)
{
    $product->delete();

    return redirect()->route('products.index')
                     ->with('success', 'Product deleted successfully');
}
Step 6: The Views (Blade Templates)
Laravel uses Blade, a powerful templating engine. We will create a simple layout and our three main views.
First, create the folder structure: resources/views/products/.
The Layout File
Create a file resources/views/layout.blade.php. We’ll use a CDN for Tailwind CSS to keep things looking good without running npm.
HTML
<!DOCTYPE html>
<html>
<head>
    <title>Laravel 12 CRUD App</title>
    <script src="https://cdn.tailwindcss.com"></script>
</head>
<body class="bg-gray-100 p-10">
    <div class="container mx-auto">
        <h1 class="text-3xl font-bold mb-4 text-center">Laravel 12 Inventory Manager</h1>

        <div class="bg-white p-6 rounded-lg shadow-md">
            @if ($message = Session::get('success'))
                <div class="bg-green-100 border border-green-400 text-green-700 px-4 py-3 rounded mb-4">
                    <p>{{ $message }}</p>
                </div>
            @endif

            @yield('content')
        </div>
    </div>
</body>
</html>
The Index View (List Products)
Create resources/views/products/index.blade.php.
HTML
@extends('layout')

@section('content')
    <div class="flex justify-between items-center mb-4">
        <h2 class="text-xl font-semibold">Product List</h2>
        <a class="bg-blue-500 text-white px-4 py-2 rounded hover:bg-blue-600" href="{{ route('products.create') }}"> Create New Product</a>
    </div>

    <table class="min-w-full leading-normal">
        <thead>
            <tr>
                <th class="px-5 py-3 border-b-2 border-gray-200 bg-gray-100 text-left text-xs font-semibold text-gray-600 uppercase tracking-wider">Name</th>
                <th class="px-5 py-3 border-b-2 border-gray-200 bg-gray-100 text-left text-xs font-semibold text-gray-600 uppercase tracking-wider">Price</th>
                <th class="px-5 py-3 border-b-2 border-gray-200 bg-gray-100 text-left text-xs font-semibold text-gray-600 uppercase tracking-wider">Stock</th>
                <th class="px-5 py-3 border-b-2 border-gray-200 bg-gray-100 text-left text-xs font-semibold text-gray-600 uppercase tracking-wider">Actions</th>
            </tr>
        </thead>
        <tbody>
            @foreach ($products as $product)
            <tr>
                <td class="px-5 py-5 border-b border-gray-200 bg-white text-sm">{{ $product->name }}</td>
                <td class="px-5 py-5 border-b border-gray-200 bg-white text-sm">${{ $product->price }}</td>
                <td class="px-5 py-5 border-b border-gray-200 bg-white text-sm">{{ $product->stock }}</td>
                <td class="px-5 py-5 border-b border-gray-200 bg-white text-sm">
                    <form action="{{ route('products.destroy',$product->id) }}" method="POST">
                        <a class="text-blue-600 hover:text-blue-900 mr-2" href="{{ route('products.edit',$product->id) }}">Edit</a>

                        @csrf
                        @method('DELETE')
                        <button type="submit" class="text-red-600 hover:text-red-900" onclick="return confirm('Are you sure?')">Delete</button>
                    </form>
                </td>
            </tr>
            @endforeach
        </tbody>
    </table>

    <div class="mt-4">
        {{ $products->links() }}
    </div>
@endsection
Note: Using @csrf and @method('DELETE') is crucial for security. Browsers don’t natively understand DELETE requests, so Laravel “spoofs” it.
The Create View
Create resources/views/products/create.blade.php.
HTML
@extends('layout')

@section('content')
    <div class="flex justify-between items-center mb-4">
        <h2 class="text-xl font-semibold">Add New Product</h2>
        <a class="bg-gray-500 text-white px-4 py-2 rounded" href="{{ route('products.index') }}"> Back</a>
    </div>

    @if ($errors->any())
        <div class="bg-red-100 border border-red-400 text-red-700 px-4 py-3 rounded mb-4">
            <ul>
                @foreach ($errors->all() as $error)
                    <li>{{ $error }}</li>
                @endforeach
            </ul>
        </div>
    @endif

    <form action="{{ route('products.store') }}" method="POST">
        @csrf
        <div class="mb-4">
            <label class="block text-gray-700 text-sm font-bold mb-2">Name:</label>
            <input type="text" name="name" class="shadow appearance-none border rounded w-full py-2 px-3 text-gray-700 leading-tight focus:outline-none focus:shadow-outline" placeholder="Name">
        </div>

        <div class="mb-4">
            <label class="block text-gray-700 text-sm font-bold mb-2">Price:</label>
            <input type="number" step="0.01" name="price" class="shadow appearance-none border rounded w-full py-2 px-3 text-gray-700 leading-tight focus:outline-none focus:shadow-outline" placeholder="99.99">
        </div>

        <div class="mb-4">
            <label class="block text-gray-700 text-sm font-bold mb-2">Stock:</label>
            <input type="number" name="stock" class="shadow appearance-none border rounded w-full py-2 px-3 text-gray-700 leading-tight focus:outline-none focus:shadow-outline" placeholder="10">
        </div>

        <div class="mb-4">
            <label class="block text-gray-700 text-sm font-bold mb-2">Description:</label>
            <textarea class="shadow appearance-none border rounded w-full py-2 px-3 text-gray-700 leading-tight focus:outline-none focus:shadow-outline" name="description" placeholder="Detail"></textarea>
        </div>

        <button type="submit" class="bg-blue-500 hover:bg-blue-700 text-white font-bold py-2 px-4 rounded">Submit</button>
    </form>
@endsection
The Edit View
Create resources/views/products/edit.blade.php. This is very similar to Create, but with the fields pre-filled.
HTML
@extends('layout')

@section('content')
    <div class="flex justify-between items-center mb-4">
        <h2 class="text-xl font-semibold">Edit Product</h2>
        <a class="bg-gray-500 text-white px-4 py-2 rounded" href="{{ route('products.index') }}"> Back</a>
    </div>

    @if ($errors->any())
        <div class="bg-red-100 border border-red-400 text-red-700 px-4 py-3 rounded mb-4">
            </div>
    @endif

    <form action="{{ route('products.update', $product->id) }}" method="POST">
        @csrf
        @method('PUT')

        <div class="mb-4">
            <label class="block text-gray-700 text-sm font-bold mb-2">Name:</label>
            <input type="text" name="name" value="{{ $product->name }}" class="shadow appearance-none border rounded w-full py-2 px-3 text-gray-700 leading-tight focus:outline-none focus:shadow-outline">
        </div>

        <div class="mb-4">
            <label class="block text-gray-700 text-sm font-bold mb-2">Price:</label>
            <input type="number" step="0.01" name="price" value="{{ $product->price }}" class="shadow appearance-none border rounded w-full py-2 px-3 text-gray-700 leading-tight focus:outline-none focus:shadow-outline">
        </div>

        <div class="mb-4">
            <label class="block text-gray-700 text-sm font-bold mb-2">Stock:</label>
            <input type="number" name="stock" value="{{ $product->stock }}" class="shadow appearance-none border rounded w-full py-2 px-3 text-gray-700 leading-tight focus:outline-none focus:shadow-outline">
        </div>

        <div class="mb-4">
            <label class="block text-gray-700 text-sm font-bold mb-2">Description:</label>
            <textarea class="shadow appearance-none border rounded w-full py-2 px-3 text-gray-700 leading-tight focus:outline-none focus:shadow-outline" name="description">{{ $product->description }}</textarea>
        </div>

        <button type="submit" class="bg-blue-500 hover:bg-blue-700 text-white font-bold py-2 px-4 rounded">Update</button>
    </form>
@endsection
Step 7: Testing Your Application
Go back to your terminal. If the server isn’t running, start it:
Bash
php artisan serve
Navigate to http://localhost:8000/products.
- Click “Create New Product”: Fill out the form and submit. You should be redirected back to the list with a green success message.
- Edit: Click “Edit” on your new item, change the price, and save. The change should reflect immediately.
- Delete: Click “Delete”. You will get a browser confirmation popup. Confirm it, and the item will vanish.
Conclusion
You have just built a fully functional CRUD application in Laravel 12.
While this example is simple, it demonstrates the power of the framework. We used Migrations to version-control our database, Eloquent to interact with data without writing SQL, Resource Controllers to keep our logic organized, and Blade to render clean HTML.
From here, you can expand this application by adding User Authentication (using Laravel Breeze or Jetstream), implementing API resources for a mobile app, or adding image uploads for your products.
Standard SEO Tags
- Laravel 12
- Laravel Tutorial
- PHP Framework
- CRUD Application
- Web Development
- Eloquent ORM
- Blade Templating
- Database Migrations
- MVC Architecture
- Beginner Guide
Leave a Reply